Replacing Intercooler Pump
SaskDelta's :: The Garage :: 2.0 LSJ S/C
Page 1 of 1

Replacing Intercooler Pump
![]() by ßlåçk§mókè 2009-12-13, 22:59
by ßlåçk§mókè 2009-12-13, 22:59
Info Source: RedlineForums.com
Supplies:
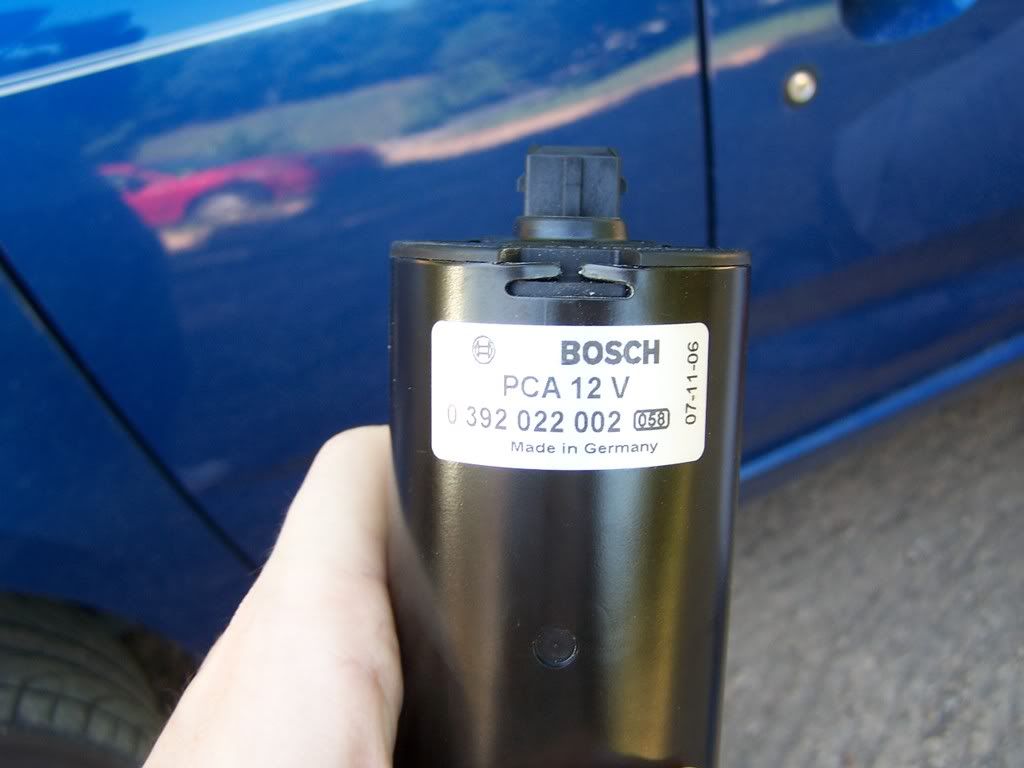
Obviously, a new intercooler pump. The pump is produced by Bosch and was used in Ford Cobras and Lightnings, I found mine on eBay for ~$100 shipped
Tools: There are many ways to go about this install, but these are the tools that I used from top down/left to right.
Socket Wrench with extension and knuckle; 13mm OR [(not shown)
3/8" drive ratchet with only a 13mm socket
Vice grip
Wrench
Two modified vice grips (see below) OR [(not shown) a hose clamp tool, see post 6]
Needle nose pliers
13 mm wrench
NOT shown:
Car JackStand
Bucket/cup
Razor/sharp knife (may or may not be needed)
Dexcool antifreeze/ water 50/50 mix
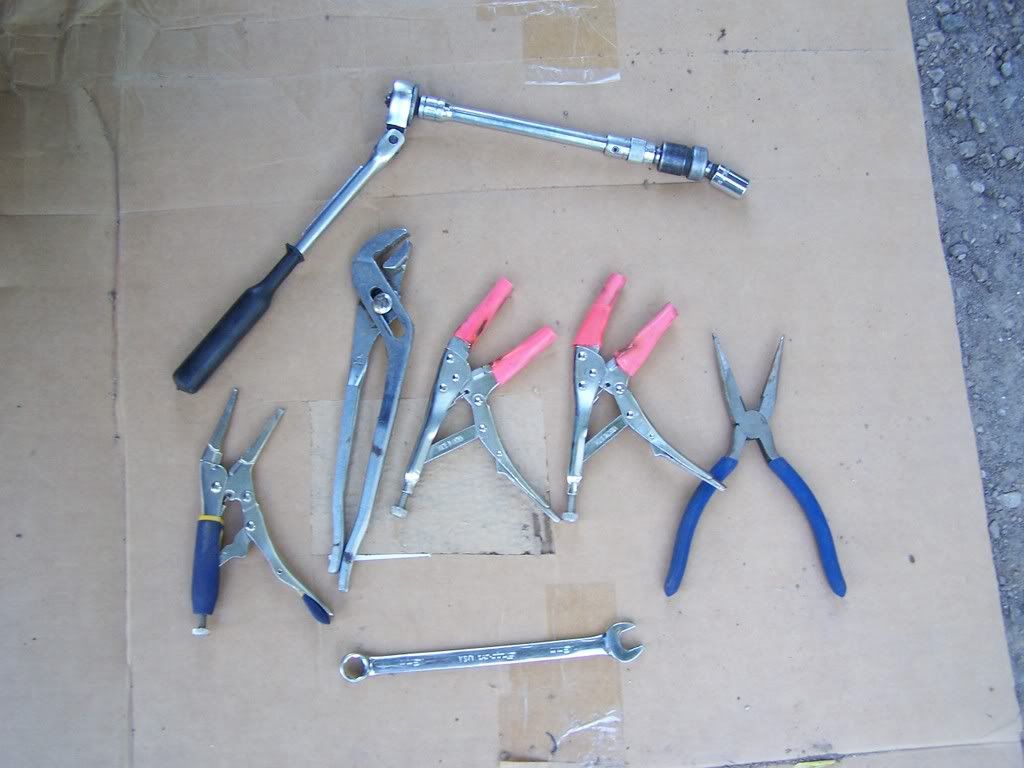
The modified vice grips have pieces of rubber hose slid over both ends. These are used to clamp the intercooler fluid hoses and the added rubber hose protects from damage with the clamp.
1.Jack up the car on the right side near the front and use a jack stand to support the car. Never rely on a jack alone to hold the car!

In the middle of the car on the underside just behind the radiator and heat exchanger, you'll find the old pump held by a bracket.

2. Disconnect the wire connector from the right side of the pump.
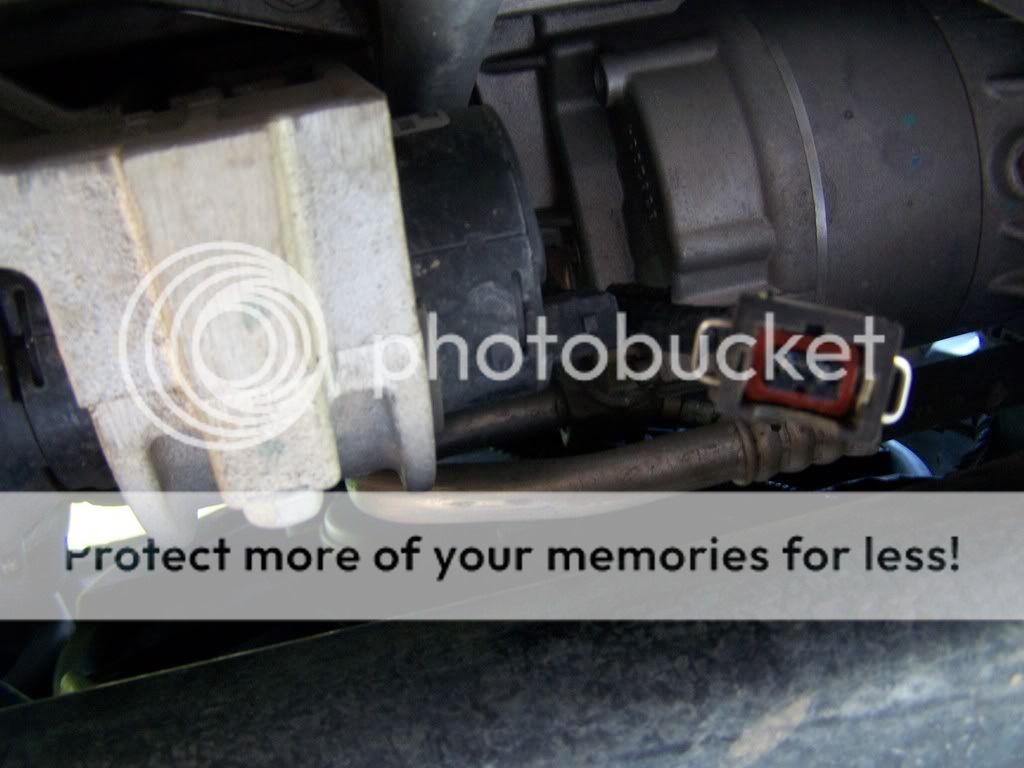
(These pictures are taken laying down with the bottom of the picture being towards the front of the car and the top being towards the back)
3. Take out the bolts
Using the a 13mm wrench, loosen the bottom bolt holding the bracket in place.

The second bolt is above the pump, and can therefore not be seen in the picture. To remove this bolt, either
1. use the 13mm socket wrench with extender and knuckle. The extender adds length to the wrench and the knuckle allows the end to angle and meet the bolt. Here it shows this being used going around the frame to reach the bolt use a 3/8" drive ratchet with only a 13mm socket on it to get to the top pump mount bolt by sliding it between the mount and the frame

The pump is now free except for the hoses

This is the piece of the bracket that was removed to free the pump. It has a rubber ring on it that encircles the pump.

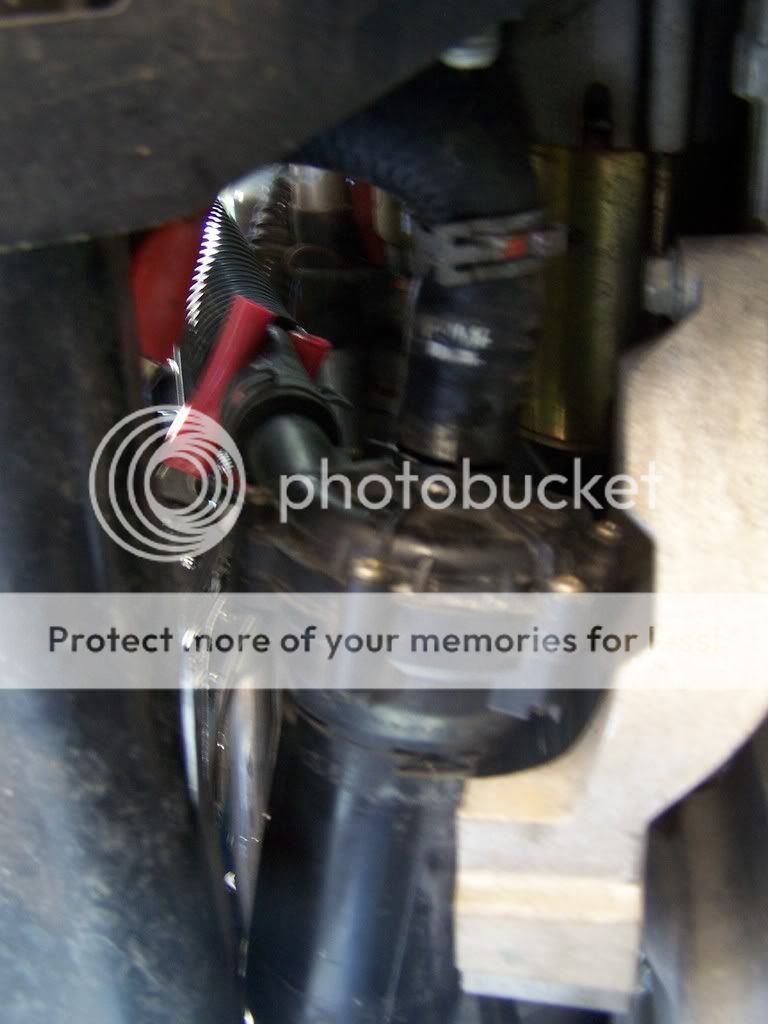
4. Clamp the hoses
There are two hoses (in and out) that need to be clamped so fluid won't drain once the pump is removed. Either,
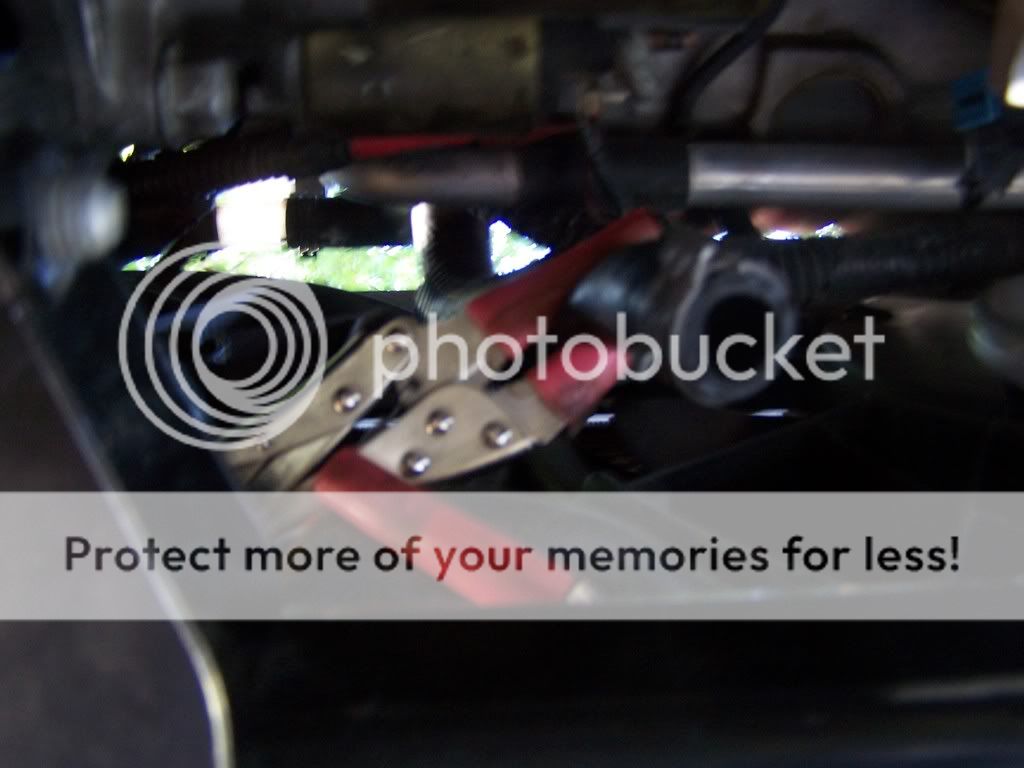
1.Use the modified vice grips to pinch off the hoses as far away from the pump as you can, you'll need the extra space.
2. or use the hose clamp tool if you decided to use one<br>
5. Remove the metal ring clamps around the hose and the pump inlet/outlets.
This takes some ingenuity, and there are some decisions to make so read ahead for this step. Space is tight, so try to use the sliding wrench, needle nose pliers, unmodified vice grip (whichever works best) to get a hold of the clamp and push the two pieces together. Try to wiggle the metal clamps up hose away from the pump. You may even want to try a flathead screw driver to help pry/push the hose off.
When you get either hose off some coolant will come out of the hoses and pump! Antifreeze is very dangerous so watch your mouth (as in getting any in it) when doing this! If you can try to have the bucket ready to catch the fluid.
Someone at GM decided it would be smart to glue the clamps to the outside of the hose with adhesive that holds tiles on space shuttles. As you can see, I got the clamp off but the end of the hose was slightly damaged. I had to cut straight both hoses just under the damage with a razor (you have enough hose to work with, don't worry)
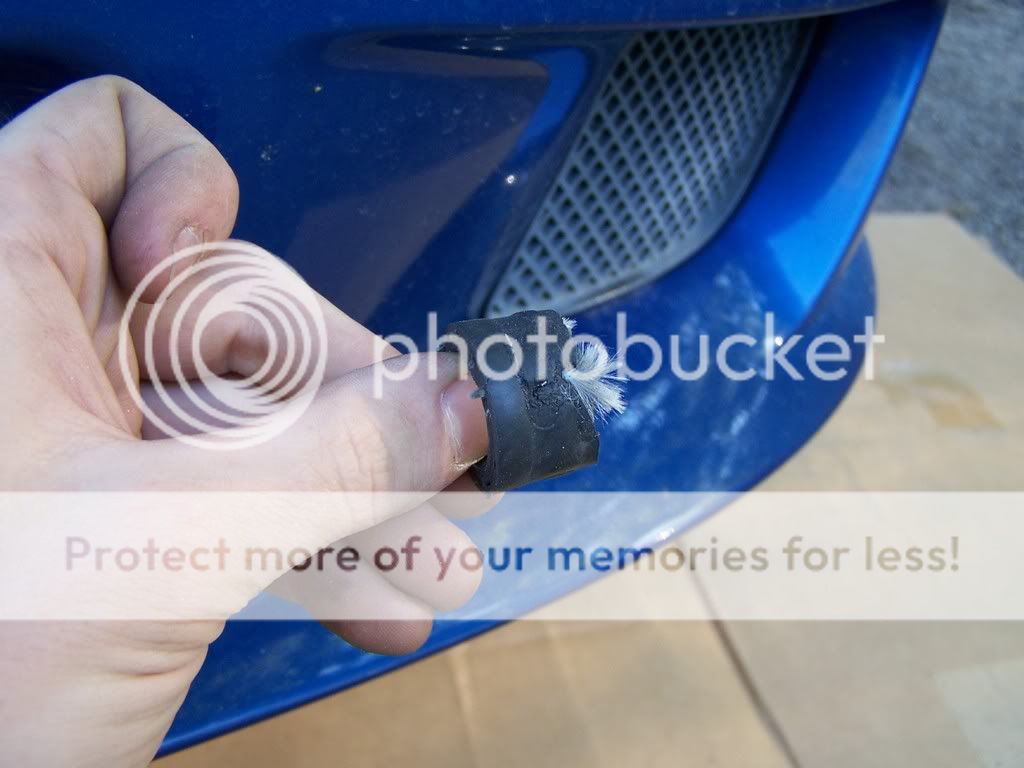
It was hard to remove the clamps glued to the hose so if yours doesn't slide up easy, you may want to go ahead and cut the hose above the metal ring clamps, remove them from the ends, and slide them on the fresh ends.
The pump is now off

6. Install new pump
Reverse the uninstall process on this one.
Reattach hoses to correct nozzles on pump
Slide clamps back down over hose/ pump ends
Remove vice grip clamps
Situate pump and use bracket to secure
Read next step for wires
Reattach the wires to your pump
There is a great thread about this that was started by Amishland Intercooler Wiring Reversed!! Basically, on all 04's and some 05's the wires were reversed from the factory. The positive (all black) wire was connected to the negative terminal on the pump and the negative (black and white) to the positive. The pump terminals are indicated on the pump housing
I had mine fixed by a dealer but by all means makes sure yours are correct. This is probably the reason you just replaced your pump!
After you are sure that your wires are correct, reattach the wiring harness.
8. Lower your car and watch in amazement the movement in the filler neck! The pump starts 10 seconds after you start your car (as in crank and engine running, the key simply in the "run" position does not work).
Because you were probably low on the 50/50 mix of dexcool water mix (the high temps evaporated some liquid), you may need to add some and there may be some air in your system.
I let my car run for about ten minutes and slowly added nearly a pint over a few courses of letting the fluid level lower after adding some. You may need to do this for several days after trips to get all of the bubbles out. Also, you may decide to try using the bleeder bolt on the stock heat exchanger...
Yeah, I saw the bleeder bolt thing in an old thread. Take off the pass. headlight and find the top of the intercooler (heat exchanger), the one behind the A/C condenser, I think. There's a smallish (10mm?) aluminum plug sticking out of the top of the HE, you can't miss it. I ran the pump with that plug almost falling out and it bubbled and seeped alittle, so you have to watch it, but fill it until it starts coming out. Also, be careful putting it back in, it'll strip really easily since it's aluminum, and you want it to seal!
Supplies:
Obviously, a new intercooler pump. The pump is produced by Bosch and was used in Ford Cobras and Lightnings, I found mine on eBay for ~$100 shipped
Tools: There are many ways to go about this install, but these are the tools that I used from top down/left to right.
Socket Wrench with extension and knuckle; 13mm OR [(not shown)
3/8" drive ratchet with only a 13mm socket
Vice grip
Wrench
Two modified vice grips (see below) OR [(not shown) a hose clamp tool, see post 6]
Needle nose pliers
13 mm wrench
NOT shown:
Car JackStand
Bucket/cup
Razor/sharp knife (may or may not be needed)
Dexcool antifreeze/ water 50/50 mix
The modified vice grips have pieces of rubber hose slid over both ends. These are used to clamp the intercooler fluid hoses and the added rubber hose protects from damage with the clamp.
1.Jack up the car on the right side near the front and use a jack stand to support the car. Never rely on a jack alone to hold the car!
In the middle of the car on the underside just behind the radiator and heat exchanger, you'll find the old pump held by a bracket.
2. Disconnect the wire connector from the right side of the pump.
(These pictures are taken laying down with the bottom of the picture being towards the front of the car and the top being towards the back)
3. Take out the bolts
Using the a 13mm wrench, loosen the bottom bolt holding the bracket in place.
The second bolt is above the pump, and can therefore not be seen in the picture. To remove this bolt, either
1. use the 13mm socket wrench with extender and knuckle. The extender adds length to the wrench and the knuckle allows the end to angle and meet the bolt. Here it shows this being used going around the frame to reach the bolt use a 3/8" drive ratchet with only a 13mm socket on it to get to the top pump mount bolt by sliding it between the mount and the frame
The pump is now free except for the hoses
This is the piece of the bracket that was removed to free the pump. It has a rubber ring on it that encircles the pump.
4. Clamp the hoses
There are two hoses (in and out) that need to be clamped so fluid won't drain once the pump is removed. Either,
1.Use the modified vice grips to pinch off the hoses as far away from the pump as you can, you'll need the extra space.
2. or use the hose clamp tool if you decided to use one<br>
5. Remove the metal ring clamps around the hose and the pump inlet/outlets.
This takes some ingenuity, and there are some decisions to make so read ahead for this step. Space is tight, so try to use the sliding wrench, needle nose pliers, unmodified vice grip (whichever works best) to get a hold of the clamp and push the two pieces together. Try to wiggle the metal clamps up hose away from the pump. You may even want to try a flathead screw driver to help pry/push the hose off.
When you get either hose off some coolant will come out of the hoses and pump! Antifreeze is very dangerous so watch your mouth (as in getting any in it) when doing this! If you can try to have the bucket ready to catch the fluid.
Someone at GM decided it would be smart to glue the clamps to the outside of the hose with adhesive that holds tiles on space shuttles. As you can see, I got the clamp off but the end of the hose was slightly damaged. I had to cut straight both hoses just under the damage with a razor (you have enough hose to work with, don't worry)
It was hard to remove the clamps glued to the hose so if yours doesn't slide up easy, you may want to go ahead and cut the hose above the metal ring clamps, remove them from the ends, and slide them on the fresh ends.
The pump is now off
6. Install new pump
Reverse the uninstall process on this one.
Reattach hoses to correct nozzles on pump
Slide clamps back down over hose/ pump ends
Remove vice grip clamps
Situate pump and use bracket to secure
Read next step for wires
Reattach the wires to your pump
There is a great thread about this that was started by Amishland Intercooler Wiring Reversed!! Basically, on all 04's and some 05's the wires were reversed from the factory. The positive (all black) wire was connected to the negative terminal on the pump and the negative (black and white) to the positive. The pump terminals are indicated on the pump housing
I had mine fixed by a dealer but by all means makes sure yours are correct. This is probably the reason you just replaced your pump!
After you are sure that your wires are correct, reattach the wiring harness.
8. Lower your car and watch in amazement the movement in the filler neck! The pump starts 10 seconds after you start your car (as in crank and engine running, the key simply in the "run" position does not work).
Because you were probably low on the 50/50 mix of dexcool water mix (the high temps evaporated some liquid), you may need to add some and there may be some air in your system.
I let my car run for about ten minutes and slowly added nearly a pint over a few courses of letting the fluid level lower after adding some. You may need to do this for several days after trips to get all of the bubbles out. Also, you may decide to try using the bleeder bolt on the stock heat exchanger...
Yeah, I saw the bleeder bolt thing in an old thread. Take off the pass. headlight and find the top of the intercooler (heat exchanger), the one behind the A/C condenser, I think. There's a smallish (10mm?) aluminum plug sticking out of the top of the HE, you can't miss it. I ran the pump with that plug almost falling out and it bubbled and seeped alittle, so you have to watch it, but fill it until it starts coming out. Also, be careful putting it back in, it'll strip really easily since it's aluminum, and you want it to seal!

ßlåçk§mókè- The Foundation

- Posts : 603
Join date : 2009-12-05
Age : 44
SaskDelta's :: The Garage :: 2.0 LSJ S/C
Page 1 of 1
Permissions in this forum:
You cannot reply to topics in this forum|
|
|